Altiia and the Trial Islands
Game Design / Scripting / Music / Sound Design / Scrum Master
About the Game
Be ready to embark on a journey filled with exploration and challenges. In this game, you play as Altiia, a feisty creature named after her passion for high altitudes. On the hunt for treasures and adventure, she has discovered a cluster of islands which have ruins and temples scattered all around. Your journey begins as she has found a way inside a temple where an adaptable staff resides inside. This staff can be extended at command which can allow her to pole vault with finesse. However, the staff is missing a vital piece which may be hidden on one of the other islands.
Explore the islands to find hidden spots and treasures. These treasures let you customize your appearance, so you can traverse the world with style! However, if you’re the type of player who would rather enjoy competitive fun between you and your friends there are timed challenges with leaderboards so you can boast about who made it to the finish line the fastest.
Specifications
Platform: PC
Engine: Unity 2018.1
Development Time: 10 weeks
Team: 4 Designers, 4 3D Artists, 2 2D Artists
Year: 2018
My Role
We started the project by having 3 weeks of pre-production where we first had brainstorming meetings. Then we made several small prototypes for testing ideas that came out of the brainstorming. One of the ideas was a pole vault mechanic. After we had made the prototypes we had an anonymous vote to decide which idea we should go forward with. The pole vault prototype got most votes and was the idea we made into a game.
My roles during the pre-production were game designer and scripter. I was involved with coming up with ideas and to further develop ideas. I also scripted some prototypes. One of the prototypes had a feature where you had to carry your camera with you, we all liked this idea but it didn’t fit the criteria for the project. The criteria for the project were: audience awareness, sandbox, and customization.
During the production phase, my primary role was scripting. I scripted a pickup system, a challenge feature, the UI, and the HUD. I also implemented a pipeline network using splines, the idea behind it was to connect pipes to make energy flow from a source to a target. Unfortunately, this feature was cut, we hadn’t enough time to test it thoroughly and the level designers found it hard to work with. I will go into more detail of these features below.
I made the soundtrack for the game. In total, I made 5 songs. I’ve always been interested in making music but this was the first time I made music to be used for real. I made everything from composing, to mixing, and to mastering. I used FL Studio and mostly Nexus by reFX. You can listen to the Altiia and the Trial Islands Original Soundtrack here. I also made all the sound design, I used FMOD for this. This was the second time I used FMOD in a project, I had gained a lot of experience from the previous project. I built upon that knowledge to implement a better soundscape.
As Scrum Master, I made sure that the team worked efficiently and that they improved over time. I held daily meetings, sprint planning meetings, and retrospectives. I made sure that we had rooms booked for meetings and organized playtesting sessions. I also helped the Product Owner to prioritize the backlog.
Post-mortem
It was nice to have three weeks dedicated to pre-production. Having that time to iterate on ideas, prototype, and plan for production was valuable. One thing that I realized during pre-production and which made me happy was the joy of evolving each other’s ideas into the better. I got better on how to communicate between disciplines. For example, when I had made a new tool for the level designers to use, I made a step-by-step documentation for them, freeing time for myself not needing to explain it to them over and over. I learned that retrospectives are very helpful and I noticed that over time that my team became more coherent and efficient.
Challenges
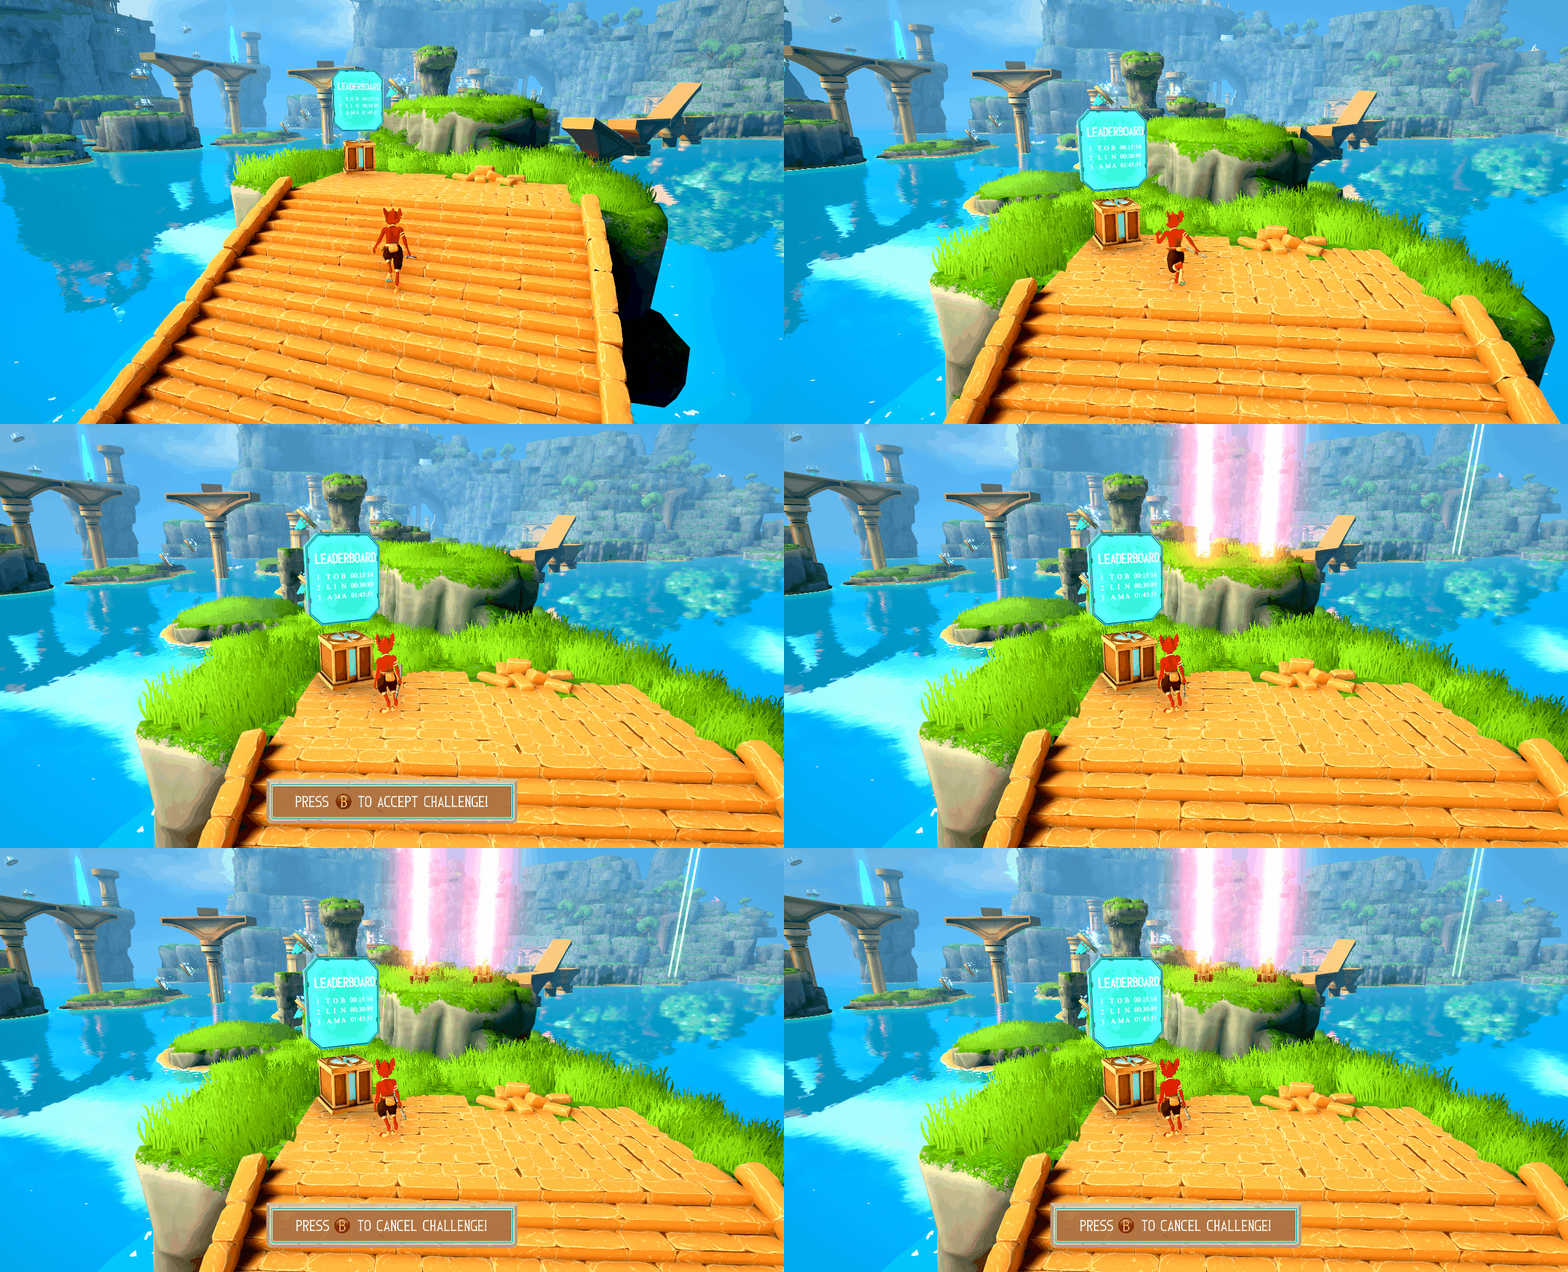
A big feature of the game is challenges. A challenge consists of a leaderboard, a start, and a goal. A challenge is started by going up to the leaderboard and accept it. If you beat the record you can enter your initials on the leaderboard. You can also make your own challenges by placing them in the world.
Prefab
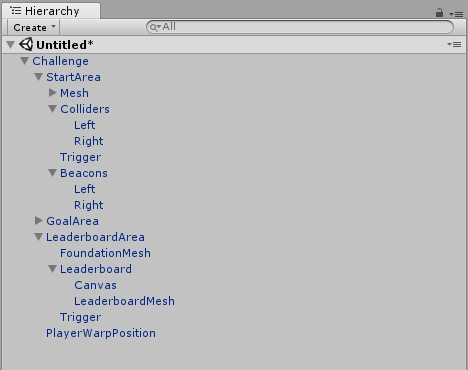
The challenge prefab has a script called “Challenge” it handles all the main logic. It also has another script “Timer” which is a timer that is started when the challenge begins. These are components at the top of the hierarchy. The first level beneath contains the “StartArea”, “GoalArea”, “LeaderboardArea”, and warp position, as seen in the image to the right.
The “StartArea” and “GoalArea” are identical. “StartArea” is just an empty game object, it has several children. I tend to separate the mesh objects from the colliders. I do this because it’s easier to move, rotate, and scale the colliders independently from the mesh. It also has a trigger, it is used to determine if the player has crossed the start line. The “LeaderboardArea” is composed of two parts: the foundation, and the actual leaderboard. The leaderboard has a Canvas set to World Space. It is used to show records on.
Challenge State
To determine in which phase of a challenge the player is I made an enum “ChallengeState”. This is used in the “Challenge” script. It is also used in another script “PlayerInteract” which handles input from the player, and depending on which state the challenge is in different code gets executed. “PlayerInteract” also has a reference variable to a challenge, which is set to the challenge that the player has activated.
|
1 2 3 4 5 6 7 8 9 10 11 12 13 14 15 16 17 18 19 20 21 22 23 24 25 26 27 28 29 |
private void ChallengeInteract() { if (Challenge != null && InputManager.InteractButtonDown) { switch (Challenge.State) { case ChallengeState.AtLeaderboardTrigger: { Challenge.ShowStartAndEndRope(); break; } case ChallengeState.Activated: { Challenge.CancelChallenge(); break; } case ChallengeState.NewRecord: { Challenge.EnterNewRecord(); break; } case ChallengeState.Warp: { Challenge.WarpPlayer(); break; } } } } |
Activate a Challenge
If a challenge is not activated only its leaderboard will be shown. By walking up to the leaderboard a popup box will be shown indicating that the player can activate the challenge. The popup box resides in another script “HudManager”, which is a singleton class.
A singleton is a class that can only be instantiated once. If it gets instantiated again it will get destroyed immediately. It also has a static property “Instance”. This setup means that all public members of it can be reached from any class without the need to initialize it. An example of a singleton initialization and a call to singleton method is shown in the code snippet below.
|
1 2 3 4 5 6 7 8 9 10 11 12 13 14 15 16 17 18 19 20 21 22 23 24 25 26 |
// Hudmanger.cs private static HudManager _instance; public static HudManager Instance { get { return _instance; } } private void Awake() { if (FindObjectsOfType(GetType()).Length > 1) { Destroy(gameObject); return; } if (_instance == null) { _instance = this; } DontDestroyOnLoad(this); } // Call to Singleton HudManager.Instance.ToggleButtonPromptLeaderboard(false); |
When the player activates the challenge the state will change to activated and the start and goal will appear from the ground. Another thing that happens is that all the other challenges’ leaderboards get hidden. This is done by finding all instances of “Challenge” and hide their leaderboards.
|
1 2 3 4 5 6 7 8 9 10 11 12 13 14 |
private void ToggleChallengesLeaderboard(bool value) { _challenges = FindObjectsOfType(); foreach (var challenge in _challenges) { if (challenge == this) { continue; } challenge.ToggleLeaderboard(value); } } |
Start a Challenge
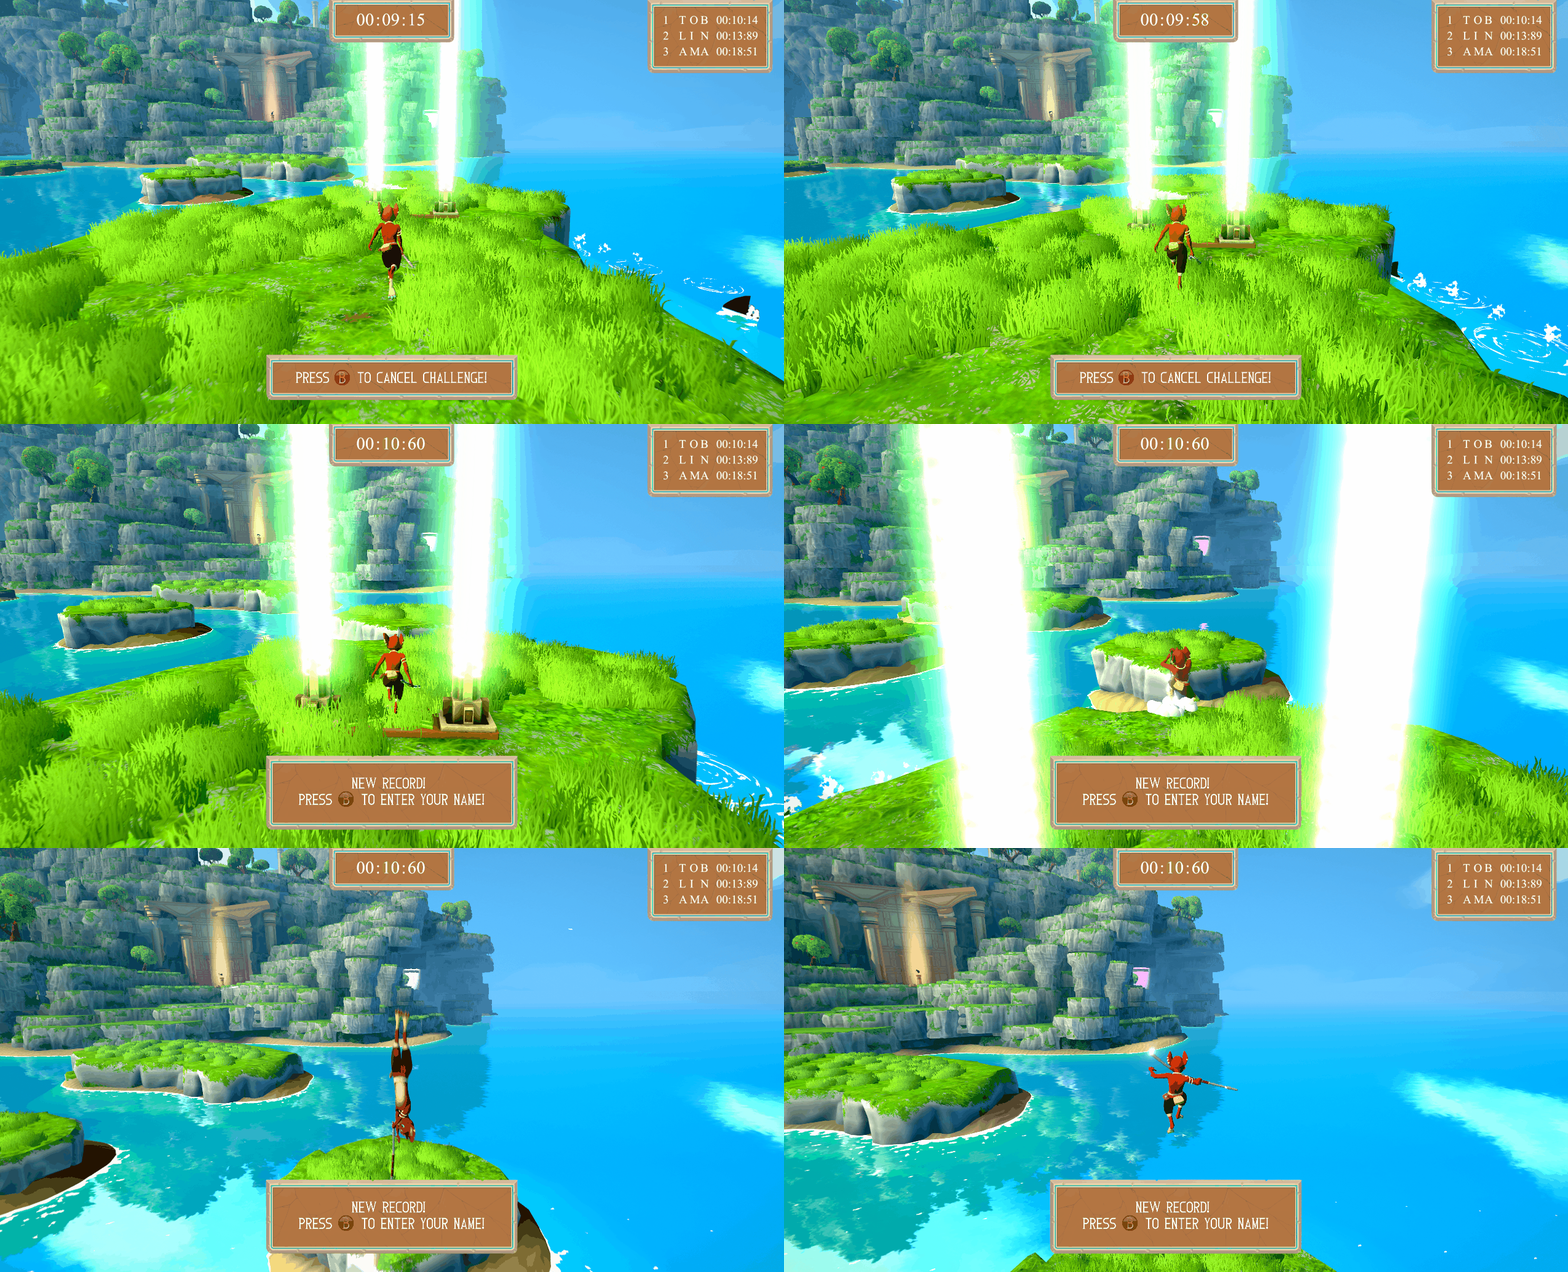
If the challenge is activated the player can start the challenge by walking over the start line. To determine if the player is crossing the start line in the right direction I used the dot product.
The dot product takes two vectors and returns a scalar value between -1 and 1 if the vectors are normalized, i.e. have a magnitude of 1. If the return value is 1 the vectors are facing in exactly the same direction, if the value is 0 they are perpendicular, and if the value is -1 they face in exactly the opposite direction.
So, to check if the player is facing in the right direction I check if the dot product of the player’s velocity and the forward vector of the start is greater than 0. By doing so the player can’t start the challenge from the wrong direction.
|
1 2 3 4 5 6 7 8 9 10 11 12 13 14 15 16 17 18 19 20 21 22 23 24 25 26 |
public void IsAtStart(Collider other) { if (State == ChallengeState.Activated) { var player = other.gameObject.GetComponentInParent(); if (IsPlayerMovingInTheRightDirection(other, player)) { _timer.StartTimer(); HudManager.Instance.ToggleTimer(true); HudManager.Instance.ShowLeaderboardBox(_leaderboardDataList); } } } private bool IsPlayerMovingInTheRightDirection(Collider other, PlayerController player) { var playerVel = player._velocity.normalized; if (player.state == PlayerController.controllerState.PoleVaulting) { playerVel = player._poleVaultVelocity.normalized; } return Vector3.Dot(playerVel, startTrigger.transform.forward) > 0; } |
Finishing a Challenge
When the player crosses the goal line one of two things happens. If it’s a new record the player will be prompted to enter initials onto the leaderboard. Otherwise, a prompt with the option to warp to the start of the challenge to try again will be shown.
Leaderboard
I made a serializable class called “LeaderboardData”. Serializable is an attribute that can be applied to a class, it will make it possible for it to show as an inspector variable in Unity. “LeaderboardData” contains 4 fields: name, minutes, seconds, and milliseconds. The challenge prefab has an array of “LeaderboardData” which is shown in the inspector. This is the initial data that will be shown on the leaderboard in the game. By doing it as an inspector variable we could easily change the predefined records for each challenge we placed in the world.
|
1 2 3 4 5 6 7 8 9 10 11 12 13 14 15 16 17 18 19 20 21 |
[Serializable] public class LeaderboardData : IComparable { public string name; [SerializeField] private int minutes; [SerializeField] private int seconds; [SerializeField] private int milliseconds; public TimeSpan time; public bool isNewRecord; public void CalculateTime() { time = new TimeSpan(0, 0, minutes, seconds, milliseconds); } public int CompareTo(LeaderboardData other) { return time.CompareTo(other.time); } } |
To show the data on a physical leaderboard’s canvas I made another prefab “PF_LeaderboardData”. At the top, it has a Horizontal Layout Group component. It has 5 children all of them has a Text component. The first one will display which place this record is in in the list. The seconds to fourth shows the initials for the record. The last one shows the time of the record. When the game is started this data is moved to a C# List for making it easier to modify later. Lastly, the code instantiates instances of “PF_LeaderboardData” onto the canvas.
|
1 2 3 4 5 6 7 8 9 10 11 12 13 14 15 16 17 18 19 20 21 22 23 24 25 26 27 28 29 30 31 32 33 34 35 36 37 38 |
public void InitializeLeaderboard() { _leaderboardDataList.Sort(); // Destroy old leaderboard for (int i = 0; i < leaderboardVerticalLayoutGroup.transform.childCount; i++) { Destroy(leaderboardVerticalLayoutGroup.transform.GetChild(i).gameObject); } // Instansiate new leaderboard for (var i = 0; i < _leaderboardDataList.Count; i++) { InstantiateLeaderboardDataPrefab(i, _leaderboardDataList[i].name, _leaderboardDataList[i].time); } } private void InstantiateLeaderboardDataPrefab(int index, string name, TimeSpan time) { var instance = Instantiate(leaderboardDataPrefab, leaderboardVerticalLayoutGroup.transform); var placeText = instance.GetChild(0).GetComponent(); var nameChar1Text = instance.GetChild(1).GetComponent(); var nameChar2Text = instance.GetChild(2).GetComponent(); var nameChar3Text = instance.GetChild(3).GetComponent(); var timeText = instance.GetChild(4).GetComponent(); placeText.text = (index + 1).ToString(); nameChar1Text.text = name.Substring(0, 1); nameChar2Text.text = name.Substring(1, 1); nameChar3Text.text = name.Substring(2, 1); timeText.text = string.Format( "{0}:{1}:{2}", time.Minutes.ToString("00"), time.Seconds.ToString("00"), time.Milliseconds.ToString("00").Substring(0, 2) ); } |
New Record or Not?
This data is then checked when the player crosses the goal line. Starting from the 1st place, if the time is less than any of the previous records the new record is inserted into the list and marked as “isNewRecord”. After that, the list is sorted and the last index gets removed since it will no longer be on the leaderboard. The state is changed to “NewRecord” and the player will be prompted with the option to enter the new record.
On the other hand, if the new time isn’t less than any of the previous records the player will be prompted with the option to warp to the start of the challenge. The state changes to “Warp”.
|
1 2 3 4 5 6 7 8 9 10 11 12 13 14 15 16 17 18 19 20 21 22 23 24 25 26 27 28 29 30 31 32 33 34 35 36 37 |
private void CheckAndUpdateLeaderboard(Collider other) { for (var i = 0; i < _leaderboardDataList.Count; i++) { if (_timer.CurrentTime < _leaderboardDataList[i].time) { _oldLeaderboardDataList = new List(_leaderboardDataList); _leaderboardDataList.Add( new LeaderboardData() { name = "---", time = _timer.CurrentTime, isNewRecord = true }); _leaderboardDataList.Sort(); _leaderboardDataList.RemoveAt(_leaderboardDataList.Count - 1); State = ChallengeState.NewRecord; HudManager.Instance.ToggleButtonPromptNewRecord(true); _cancelEnterNameCoroutine = StartCoroutine(CancelEnterNameCoroutine()); AudioManager.Instance.MusicChallengeWinTheme(); AudioManager.Instance.PlaySfx(AudioManager.Instance.challengeWinSfx, PlayerController.player.transform.position); return; } } State = ChallengeState.Warp; _cancelWarpCoroutine = StartCoroutine(CancelWarpCoroutine()); HudManager.Instance.ToggleButtonPromptLose(true); AudioManager.Instance.MusicChallengeLoseTheme(); AudioManager.Instance.PlaySfx(AudioManager.Instance.challengeLoseSfx, PlayerController.player.transform.position); } |
Enter New Record
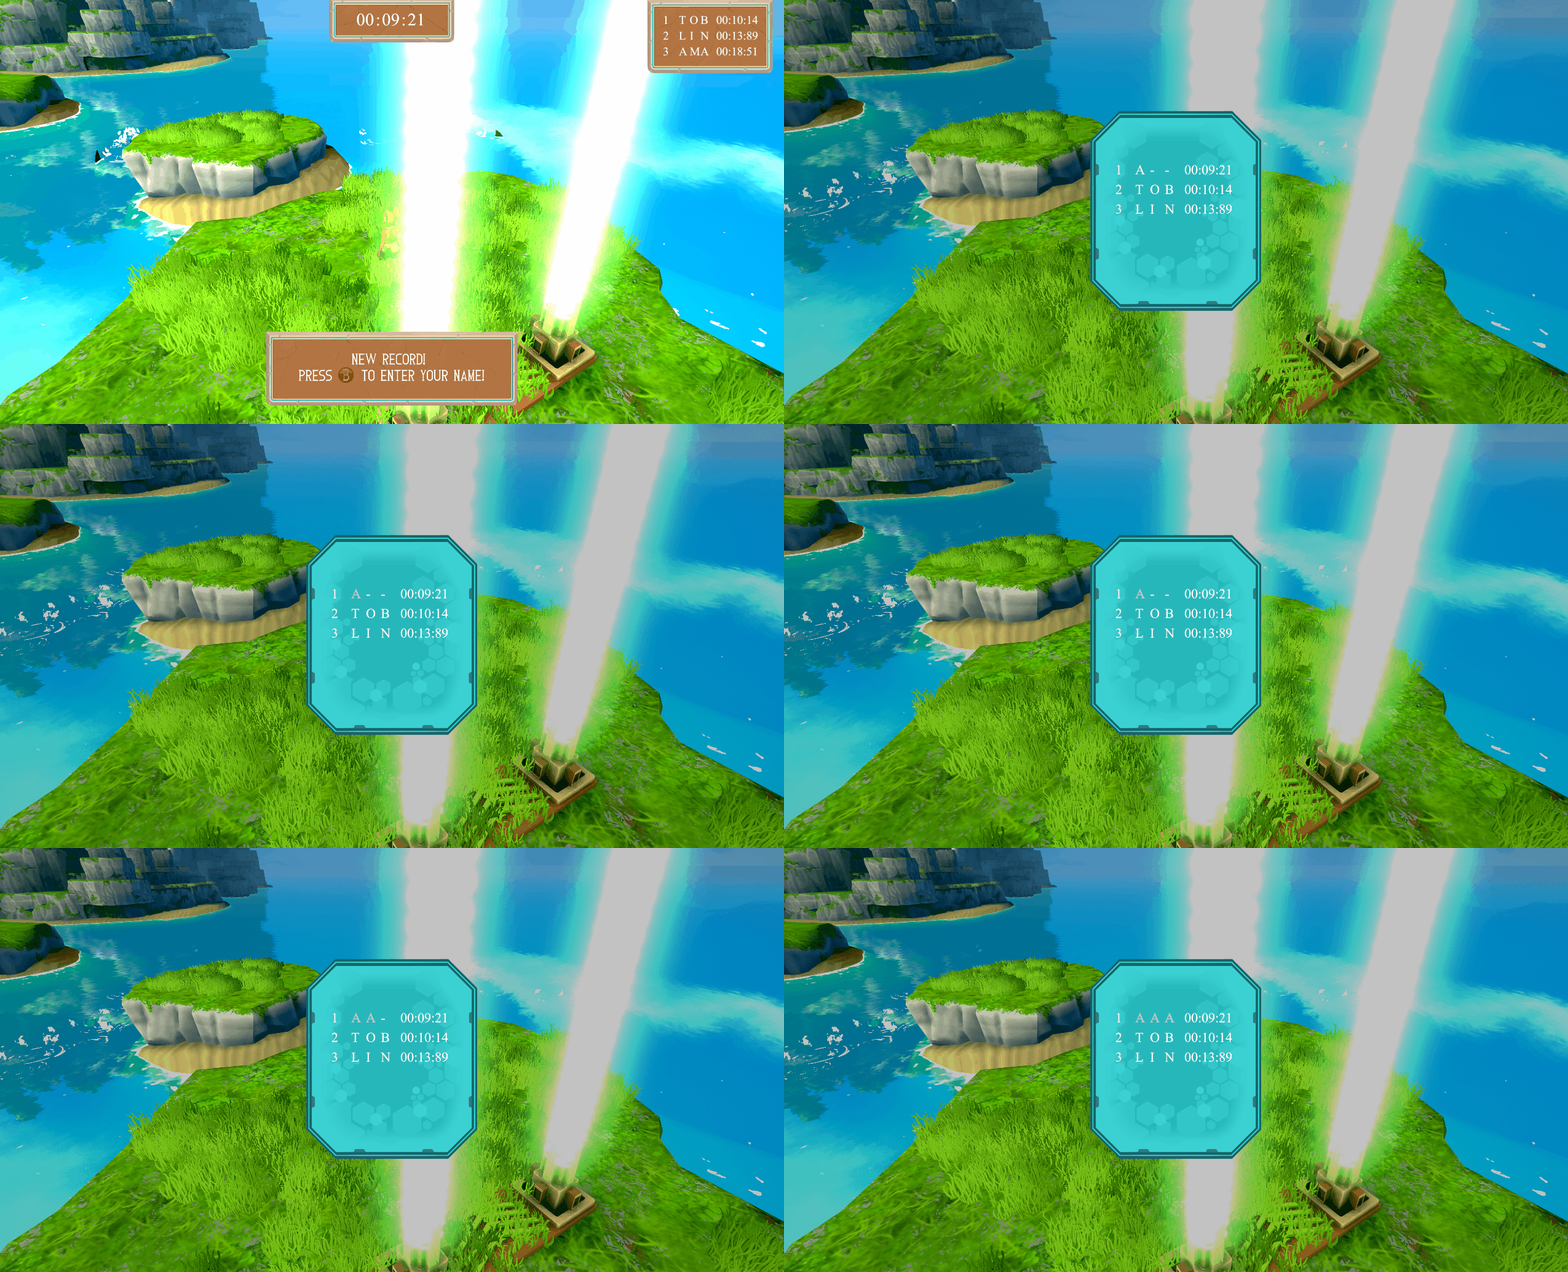
If the player chooses to enter a new record another canvas gets visible, this is a regular overlay canvas. Again the leaderboard data is initialized but now on this canvas. It loops through the leaderboard data and when it finds the data with “isNewRecord” as true it marks it as the data that should be edited.
To enter a name works similar to old arcade games by moving up and down you scroll through letters and you can enter 3 characters in total. A list of all available characters and an index variable to determine which character to show is used for this. Another index is used to know how many characters the player has entered. When done the game resumes and the challenge state changes to “Warp”.
|
1 2 3 4 5 6 7 8 9 10 11 12 13 14 15 16 17 18 19 20 21 22 23 24 25 26 27 28 |
public void ShowNewRecordPanel(List leaderboardDataList, Challenge challenge) { if (PlayerController.player.state == PlayerController.controllerState.Gliding) { PlayerController.player.StopGlide(); } Input.ResetInputAxes(); PlayerController.player.StopMovement(); HideAllPanels(); ToggleNewRecordPanel(true); _challenge = challenge; for (var i = 0; i < leaderboardDataList.Count; i++) { var instance = InstantiateLeaderboardDataPrefab(i, leaderboardDataList[i].name, leaderboardDataList[i].time); if (leaderboardDataList[i].isNewRecord) { _leaderboardRecordToEdit = instance; _leaderboardDataToEdit = leaderboardDataList[i]; _leaderboardDataToEdit.name = ""; ShowSelectChar(); _blinkCharCorutine = StartCoroutine(BlinkCharCorutine()); } } } |
Cancel and Warp
When playing a challenge the player has the possibility to cancel the challenge. When finishing or canceling a challenge the player can warp back to the beginning of the challenge. This is done by using a coroutine called “WarpCoroutine” it takes a parameter of type Action. An Action is a C# type that lets you pass in a reference to a void method. The coroutine starts by fading out the screen, in the middle the call to the Action method is made, and after that, the screen fades in again. The reason why I did like this is that this code is also used when the player dies but there is specific logic for each case and it happens between the fading phases.
|
1 2 3 4 5 6 7 8 9 10 11 12 13 14 15 16 17 18 19 20 21 22 23 24 25 26 27 28 29 30 31 32 33 34 35 36 37 38 39 40 41 42 43 44 |
IEnumerator WarpCoroutine(Action callback) { PlayerController.player._disableInput = true; // Wait time before fade yield return new WaitForSeconds(warpBeforeFadeTime); // Fade Out deathCanvasGroup.alpha = 0; var timer = 0f; deathPanel.SetActive(true); while (timer < warpFadeOutTime) { deathCanvasGroup.alpha = Mathf.Lerp(0, 1, timer / warpFadeOutTime); timer += Time.deltaTime; yield return null; } deathCanvasGroup.alpha = 1; // Warp player callback(); yield return new WaitForSeconds(warpBlackScreenWaitTime); // Fade In timer = 0f; while (timer < warpFadeInTime) { deathCanvasGroup.alpha = Mathf.Lerp(1, 0, timer / warpFadeInTime); timer += Time.deltaTime; yield return null; } deathCanvasGroup.alpha = 0; deathPanel.SetActive(false); PlayerController.player._disableInput = false; yield return null; } |
Create Own Challenge
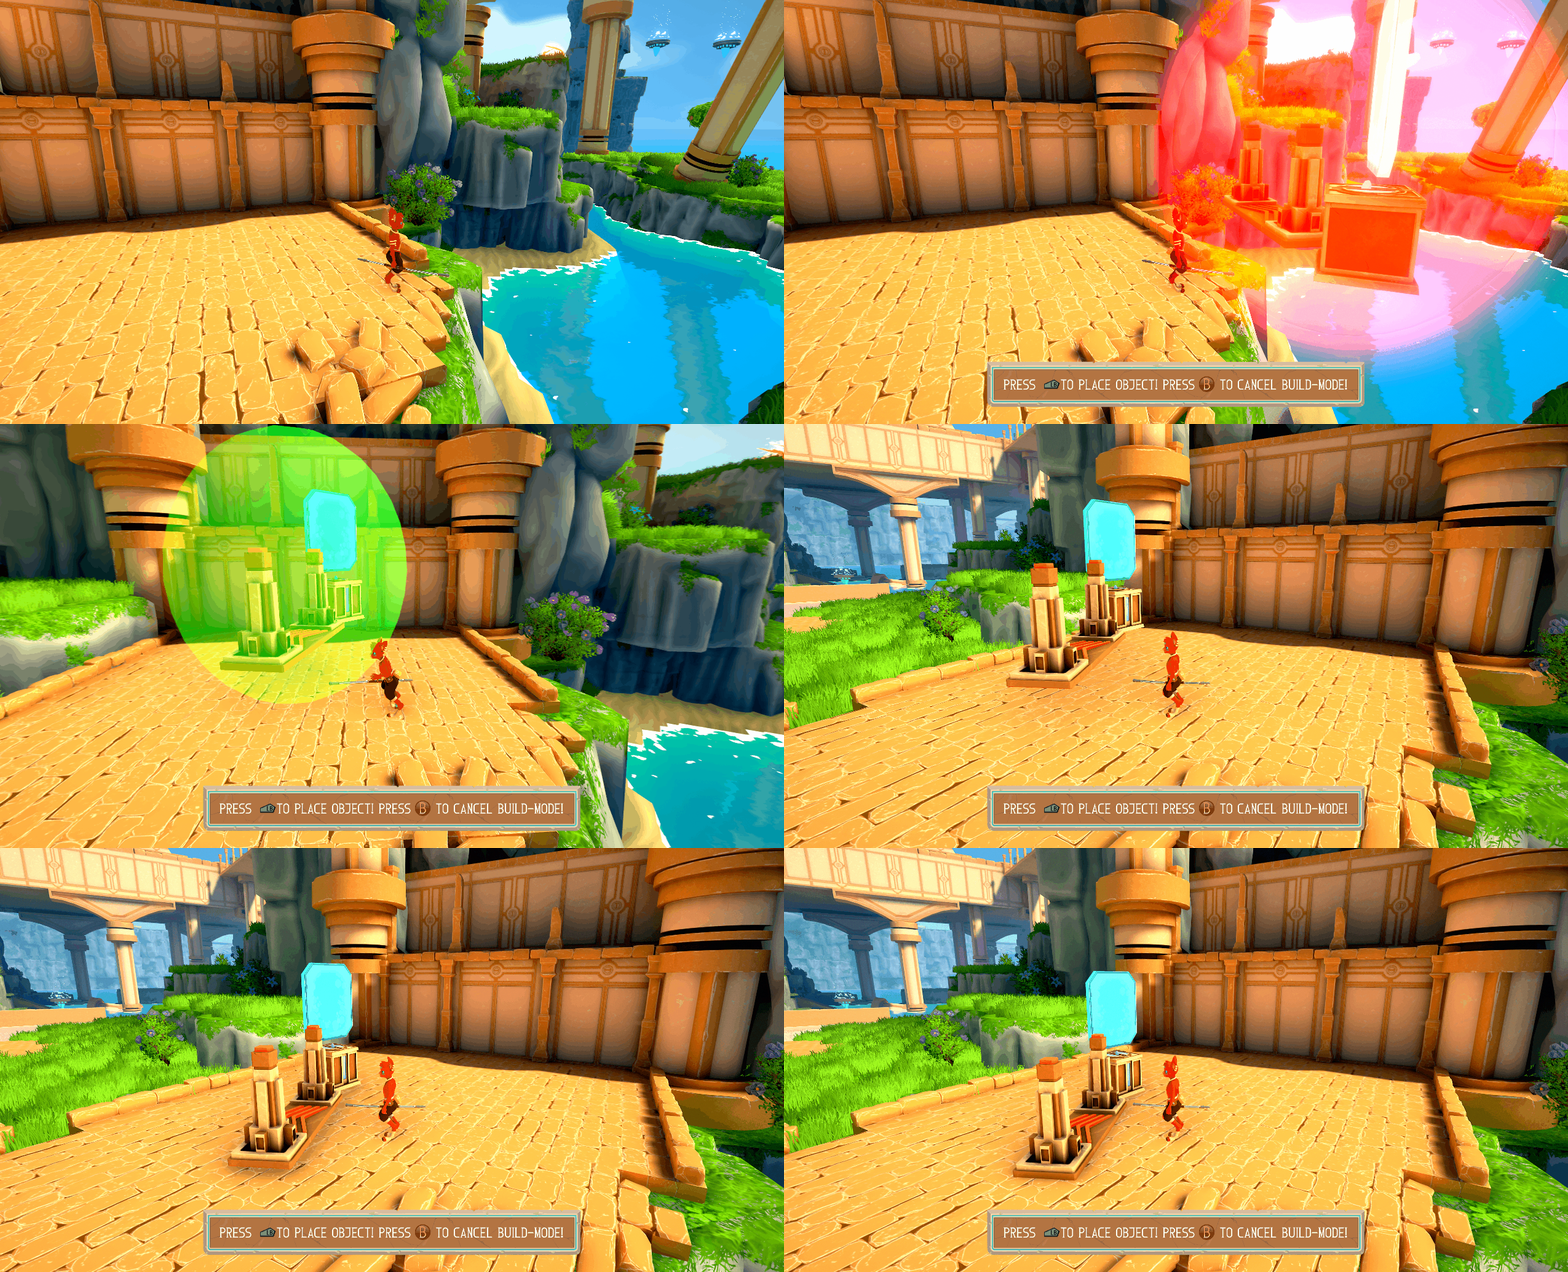
The player gets the possibility to create own challenges after finishing a predefined challenge. If the player presses the LB button on the controller, the leaderboard and start area spawns in the air in front of the player. These have a transparent sphere surrounding them which will be green if it’s possible to place it or red if not.
Instantiate Leaderboard and Start
To know in which state the feature is in I made an enum “RecordChallengeState”. To begin with, the state is set to “None”. If the conditions are met for creating a challenge and the player presses the LB button the method “InstantiateStart()” gets executed. The state changes to “PlaceStart” and the prefab for the leaderboard and start area gets instantiated. The instance’s position and rotation will be set to a socket on the player which has an offset a bit in front o the player. The parent of the instance will be set to the player so that when the player moves the instance will move with it.
|
1 2 3 4 5 6 7 8 |
private void InstantiateStart() { _recordChallengeState = RecordChallengeState.PlaceStart; _challengeStartInstance = Instantiate(challengeStartPrefab, recordChallengeSocket.transform.position, recordChallengeSocket.transform.rotation, recordChallengeSocket.transform); HudManager.Instance.ToggleButtonPromptCancelRecordChallenge(true); } |
Placeable Object
The prefab has a Rigid Body component that is set to kinematic at start. Kinematic means that it will not be affected by physics. It also has a script “PlaceableObject”. This script handles the logic for checking if it’s possible to place the object down or not.
The script has a field “_canPlace”. It also has a method “IsCollidingWithObject()” which executes once each frame. At the start of this method, “_canPlace” is set to true after that multiple checks are made to determine if “_canPlace” shall be set to false or remain true. All the checks use a LayerMask which is configured so that the player and some other layers shall be ignored. For example, when a raycast is made and if it hits the player that hit will be ignored and it will continue checking.
The first check that is made checks if there is enough room behind the player to place the object down. This is done for two reasons. The first reason is to ensure that there is enough room for the player to charge before crossing the start line. The second reason is to assure that when the player is warping that the player won’t warp inside a wall.
|
1 2 3 4 5 6 7 8 9 10 11 |
public void IsCollidingWithObject() { _canPlace = true; // Check back behind player if there is enough room Debug.DrawLine(transform.position, transform.position - transform.forward * rayCastBackLength, Color.yellow, Time.deltaTime); if (Physics.Raycast(transform.position, -transform.forward, out _hitInfoBack, rayCastBackLength, mask)) { _canPlace = false; } |
The second check looks if the object below is okay to place on, it’s a bit more complicated than the first check. It starts by making a raycast straight down if it gets a direct hit with water or another challenge it will set “_canPlace” to false. If not, it will do another raycast but not from the player but from the object that got hit by the first raycast and check if there is enough margin.
For example, if the player wants to drop the object from a cliff, the first raycast will hit the ground far below, and from that hit, the next raycast is made. If still okay, a final check is made here by using Physics.OverlapSphere from the first raycast’s hit point. From a given position and radius Physics.OverlapSphere will return an array of the objects inside that sphere. If any of these objects are water or another challenge “_canPlace” will be set to false.
|
1 2 3 4 5 6 7 8 9 10 11 12 13 14 15 16 17 18 19 20 21 22 23 24 25 26 27 28 29 30 31 32 33 34 35 36 |
// Check below if there is any direct hit with Water or Challenge Debug.DrawLine(transform.position, transform.position + Vector3.down * rayCastDownLength, Color.blue, Time.deltaTime); if (Physics.Raycast(transform.position, Vector3.down, out _hitInfo, rayCastDownLength, mask)) { // Direct hit with Water or Challenge if (_hitInfo.transform.tag == Tags.Water || _hitInfo.transform.gameObject.layer == Layers.Challenge.Index) { _canPlace = false; } // Check if hit behind at bottom else if (Physics.Raycast(_hitInfo.point, -transform.forward, out _hitInfoBack, rayCastBackLength, mask)) { _canPlace = false; } // Check if any Water or Challenge is close to the hit else { _sphereCastOrigin2 = _hitInfo.point + Vector3.up * sphereCastRadius2; var overlapSphere2 = Physics.OverlapSphere(_sphereCastOrigin2, sphereCastRadius2, mask); foreach (var o in overlapSphere2) { if (o.tag == Tags.Water) { _canPlace = false; } if (o.gameObject.layer == Layers.Challenge.Index) { _canPlace = false; } } } } |
The final check of this method will only be executed if “_canPlace” is still true, which means that there is enough room behind the player, and there is no water or challenges below the player. This check also uses a Physics.OverlapSphere but directly from the placeable object’s position and checks that there are no other objects in its vicinity. Finally, the material of the transparent sphere is changed to green or red depending on the value of “_canPlace”.
|
1 2 3 4 5 6 7 8 9 10 11 12 13 14 15 16 17 18 19 |
// If no obstacle below, check if the object is close/inside another general object if (_canPlace) { _sphereCastOrigin = transform.position + transform.right * sphereCastOffset.x + Vector3.up * sphereCastOffset.y; var overlapSphere = Physics.OverlapSphere(_sphereCastOrigin, sphereCastRadius, mask); foreach (var o in overlapSphere) { if (o.transform != transform) { _canPlace = false; break; } } } _sphereIndicatorMeshRenderer.material = (_canPlace ? placeYesMaterial : placeNoMaterial); } |
Place Leaderboard and Start
If the transparent sphere is green and the player presses the LB button the object will set free. Another method “TrySetFree()” belonging to the “PlaceableObject” script will be called. This method checks if “_canPlace” is true, and if so, sets kinematic to false which will make the object fall down. The placeable object also has a PhysicMaterial with a high bounciness, this will make the object bounce when it hits the ground.
|
1 2 3 4 5 6 7 8 9 10 11 |
public bool TrySetFree() { if (_canPlace) { sphereIndicator.SetActive(false); _rigidbody.isKinematic = false; _rigidbody.constraints = RigidbodyConstraints.FreezeRotation | RigidbodyConstraints.FreezePositionX | RigidbodyConstraints.FreezePositionZ; } return _canPlace; } |
The call to “TrySetFree() is made in the method “PlaceStart()”. If set free, a coroutine “PlaceObjectCoroutine” gets started. This coroutine takes an Action as a parameter. The coroutine will continue to run until the placeable object’s rigid body starts to sleep. A rigid body will start to sleep when it’s not moving any longer. When the object is sleeping the callback method will be executed. In this case, the method passed is the method “InstantiateGoal()”. The reason I did like this is to ensure that the object is firmly placed on the ground before going to the next state.
|
1 2 3 4 5 6 7 8 9 10 11 12 13 14 15 16 17 18 19 20 21 22 23 24 25 26 27 28 29 30 31 32 33 34 35 36 37 38 39 40 41 |
// PlaceStart (PlayerInteract.cs) private void PlaceStart() { var placeableObject = _challengeStartInstance.GetComponent(); if (placeableObject.TrySetFree()) { _challengeStartInstance.transform.parent = null; _placeObjectCoroutine = StartCoroutine(PlaceObjectCoroutine(placeableObject, RecordChallengeState.InstantiateGoal, InstantiateGoal)); } } IEnumerator PlaceObjectCoroutine(PlaceableObject placeableObject, RecordChallengeState newState, Action callback) { _recordChallengeState = RecordChallengeState.Wait; while (true) { if (!placeableObject.IsSleeping()) { yield return new WaitForSeconds(Time.deltaTime); } else { _recordChallengeState = newState; callback(); yield break; } } } // IsSleeping (PlaceableObject) public bool IsSleeping() { return _rigidbody.IsSleeping(); } |
Transform into a Real Challenge
Placing the goal works similarly. After placing the goal the player will be prompted with two options either cancel the built challenge or transforming it into a real challenge. If the player creates the challenge the method “TransformIntoRealChallenge()” will be called. This method instantiates a prefab containing an entire challenge.
|
1 2 3 4 5 6 7 8 9 10 11 12 |
private void TransformIntoRealChallenge() { _challengeInstance = Instantiate(challengePrefab, Vector3.zero, Quaternion.identity); _challenge = _challengeInstance.GetComponent(); var leaderboardTransform = _challengeStartInstance.GetComponent().leaderboardTransform; _challenge.SetTransforms(leaderboardTransform, _challengeStartInstance.transform, _challengeGoalInstance.transform); Challenge = _challenge; DestroyChallengeInstances(); } |
From this method, the transforms of the leaderboard, start, and goal are passed to “SetTransforms” a method belonging to the “Challenge” script. Inside this method, the positions and rotations of the challenge’s own leaderboard, start, and goal are set to the same as the placeable objects’ positions and rotations.
Next, the leaderboard times are calculated. Now we can’t rely on ourselves editing the times since we have no idea how the player will place the objects. I came up with a formula that worked quite well. By taking the distance between the start and goal area and divide it by 5 will give us the 1st place time. Then multiply this value by 2 and 3 for the 2nd respectively 3rd place. Finally, a random name is retrieved from an array of predefined names containing all the team members’ names!
|
1 2 3 4 5 6 7 8 9 10 11 12 13 14 15 16 17 18 19 20 21 22 23 24 25 26 27 28 29 30 31 32 |
public void SetTransforms(Transform leaderboardTransform, Transform startTransform, Transform goalTransform) { leaderboard.transform.position = leaderboardTransform.position; leaderboard.transform.rotation = Quaternion.Euler(0, 180, 0) * leaderboardTransform.rotation; startRope.transform.position = startTransform.position; startRope.transform.rotation = startTransform.rotation; endRope.transform.position = goalTransform.position; endRope.transform.rotation = goalTransform.rotation; var distance = Vector3.Distance(startRope.transform.position, endRope.transform.position); var firstPlaceTime = Mathf.CeilToInt(distance / 5); SetLeaderboardTimeAndRandomizeName(0, firstPlaceTime); SetLeaderboardTimeAndRandomizeName(1, firstPlaceTime * 2); SetLeaderboardTimeAndRandomizeName(2, firstPlaceTime * 3); playerWarp.position = leaderboard.transform.position - leaderboard.transform.forward * 5f; _showWarpTextAfterDoneRecordingCoroutine = StartCoroutine(ShowWarpTextAfterDoneRecordingCoroutine()); } private void SetLeaderboardTimeAndRandomizeName(int index, float timeInSeconds) { var randomIndex = UE.Random.Range(0, _leaderboardNames.Count); _leaderboardDataList[index].time = TimeSpan.FromSeconds(timeInSeconds); _leaderboardDataList[index].name = _leaderboardNames[randomIndex]; _leaderboardNames.RemoveAt(randomIndex); } |
Other Features
UI
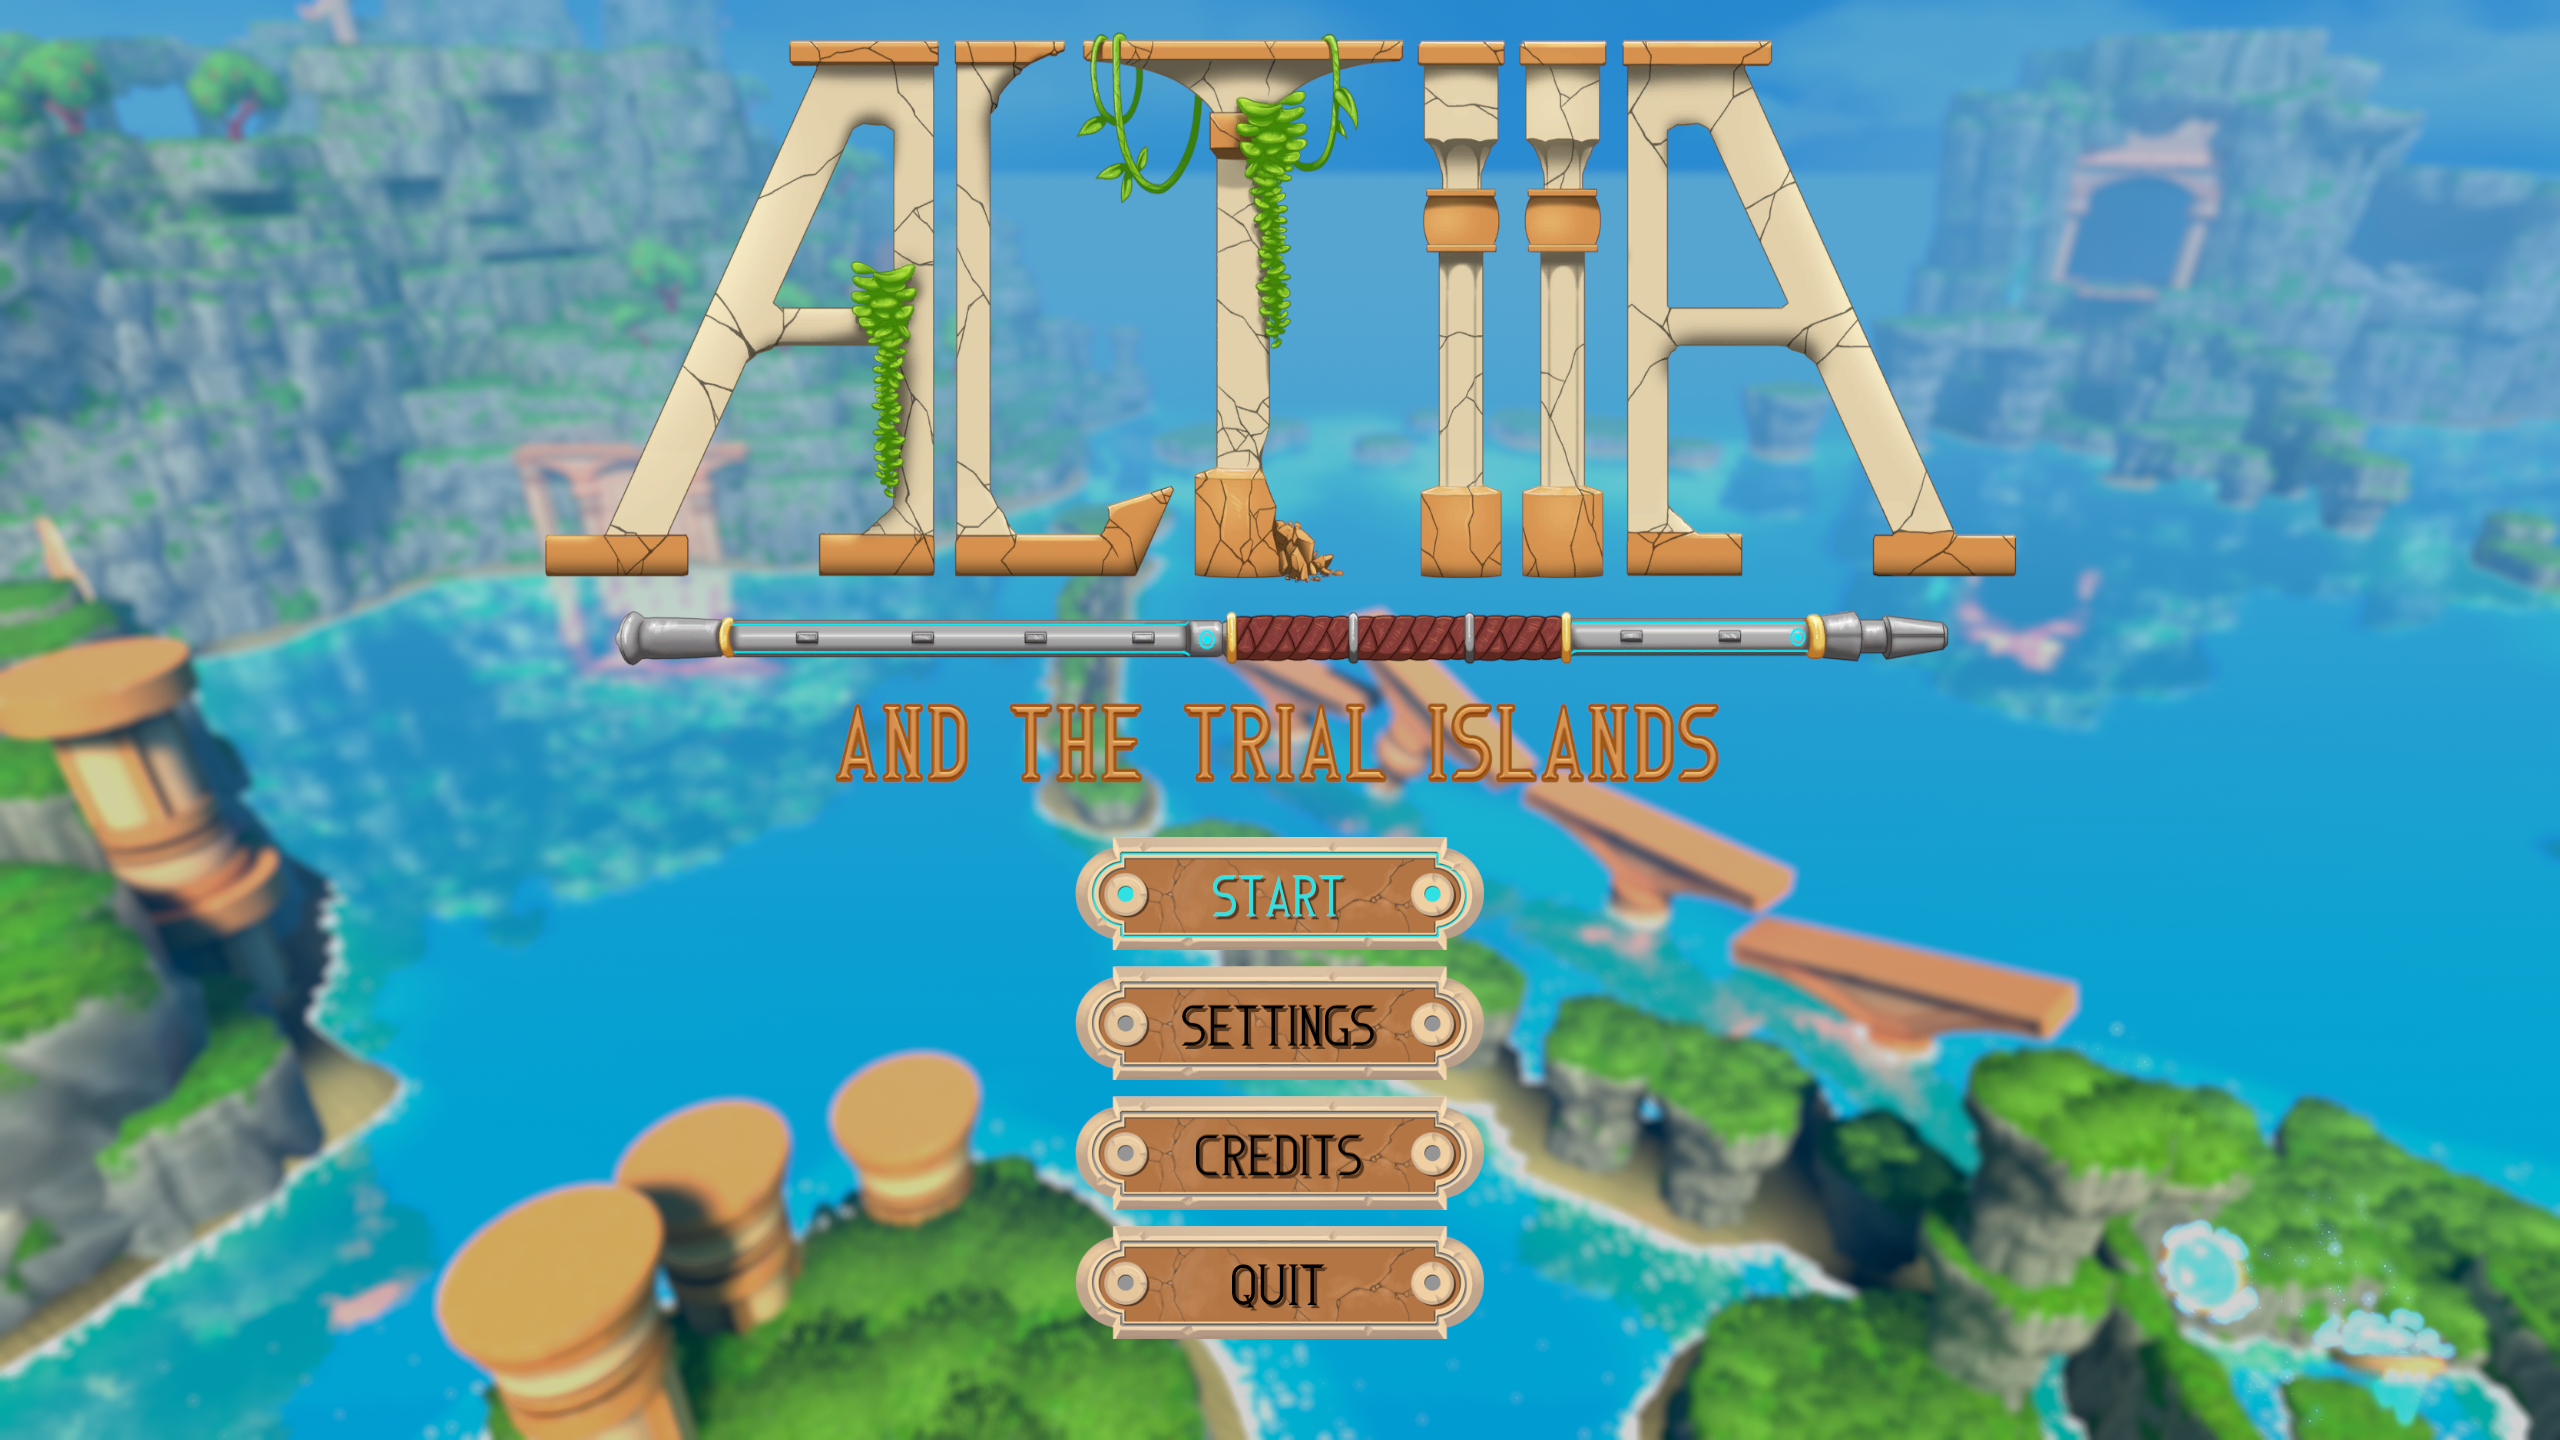
I made the entire UI for the game. It has options for “Start”, “Settings”, “Controls”, “Credits”, “Main Menu”, and “Quit”. Depending on if the game is paused or if it’s in the Main Menu different options will be shown. For Main Menu and Quit a confirm box “Are You Sure?” is shown.
Loading Screen
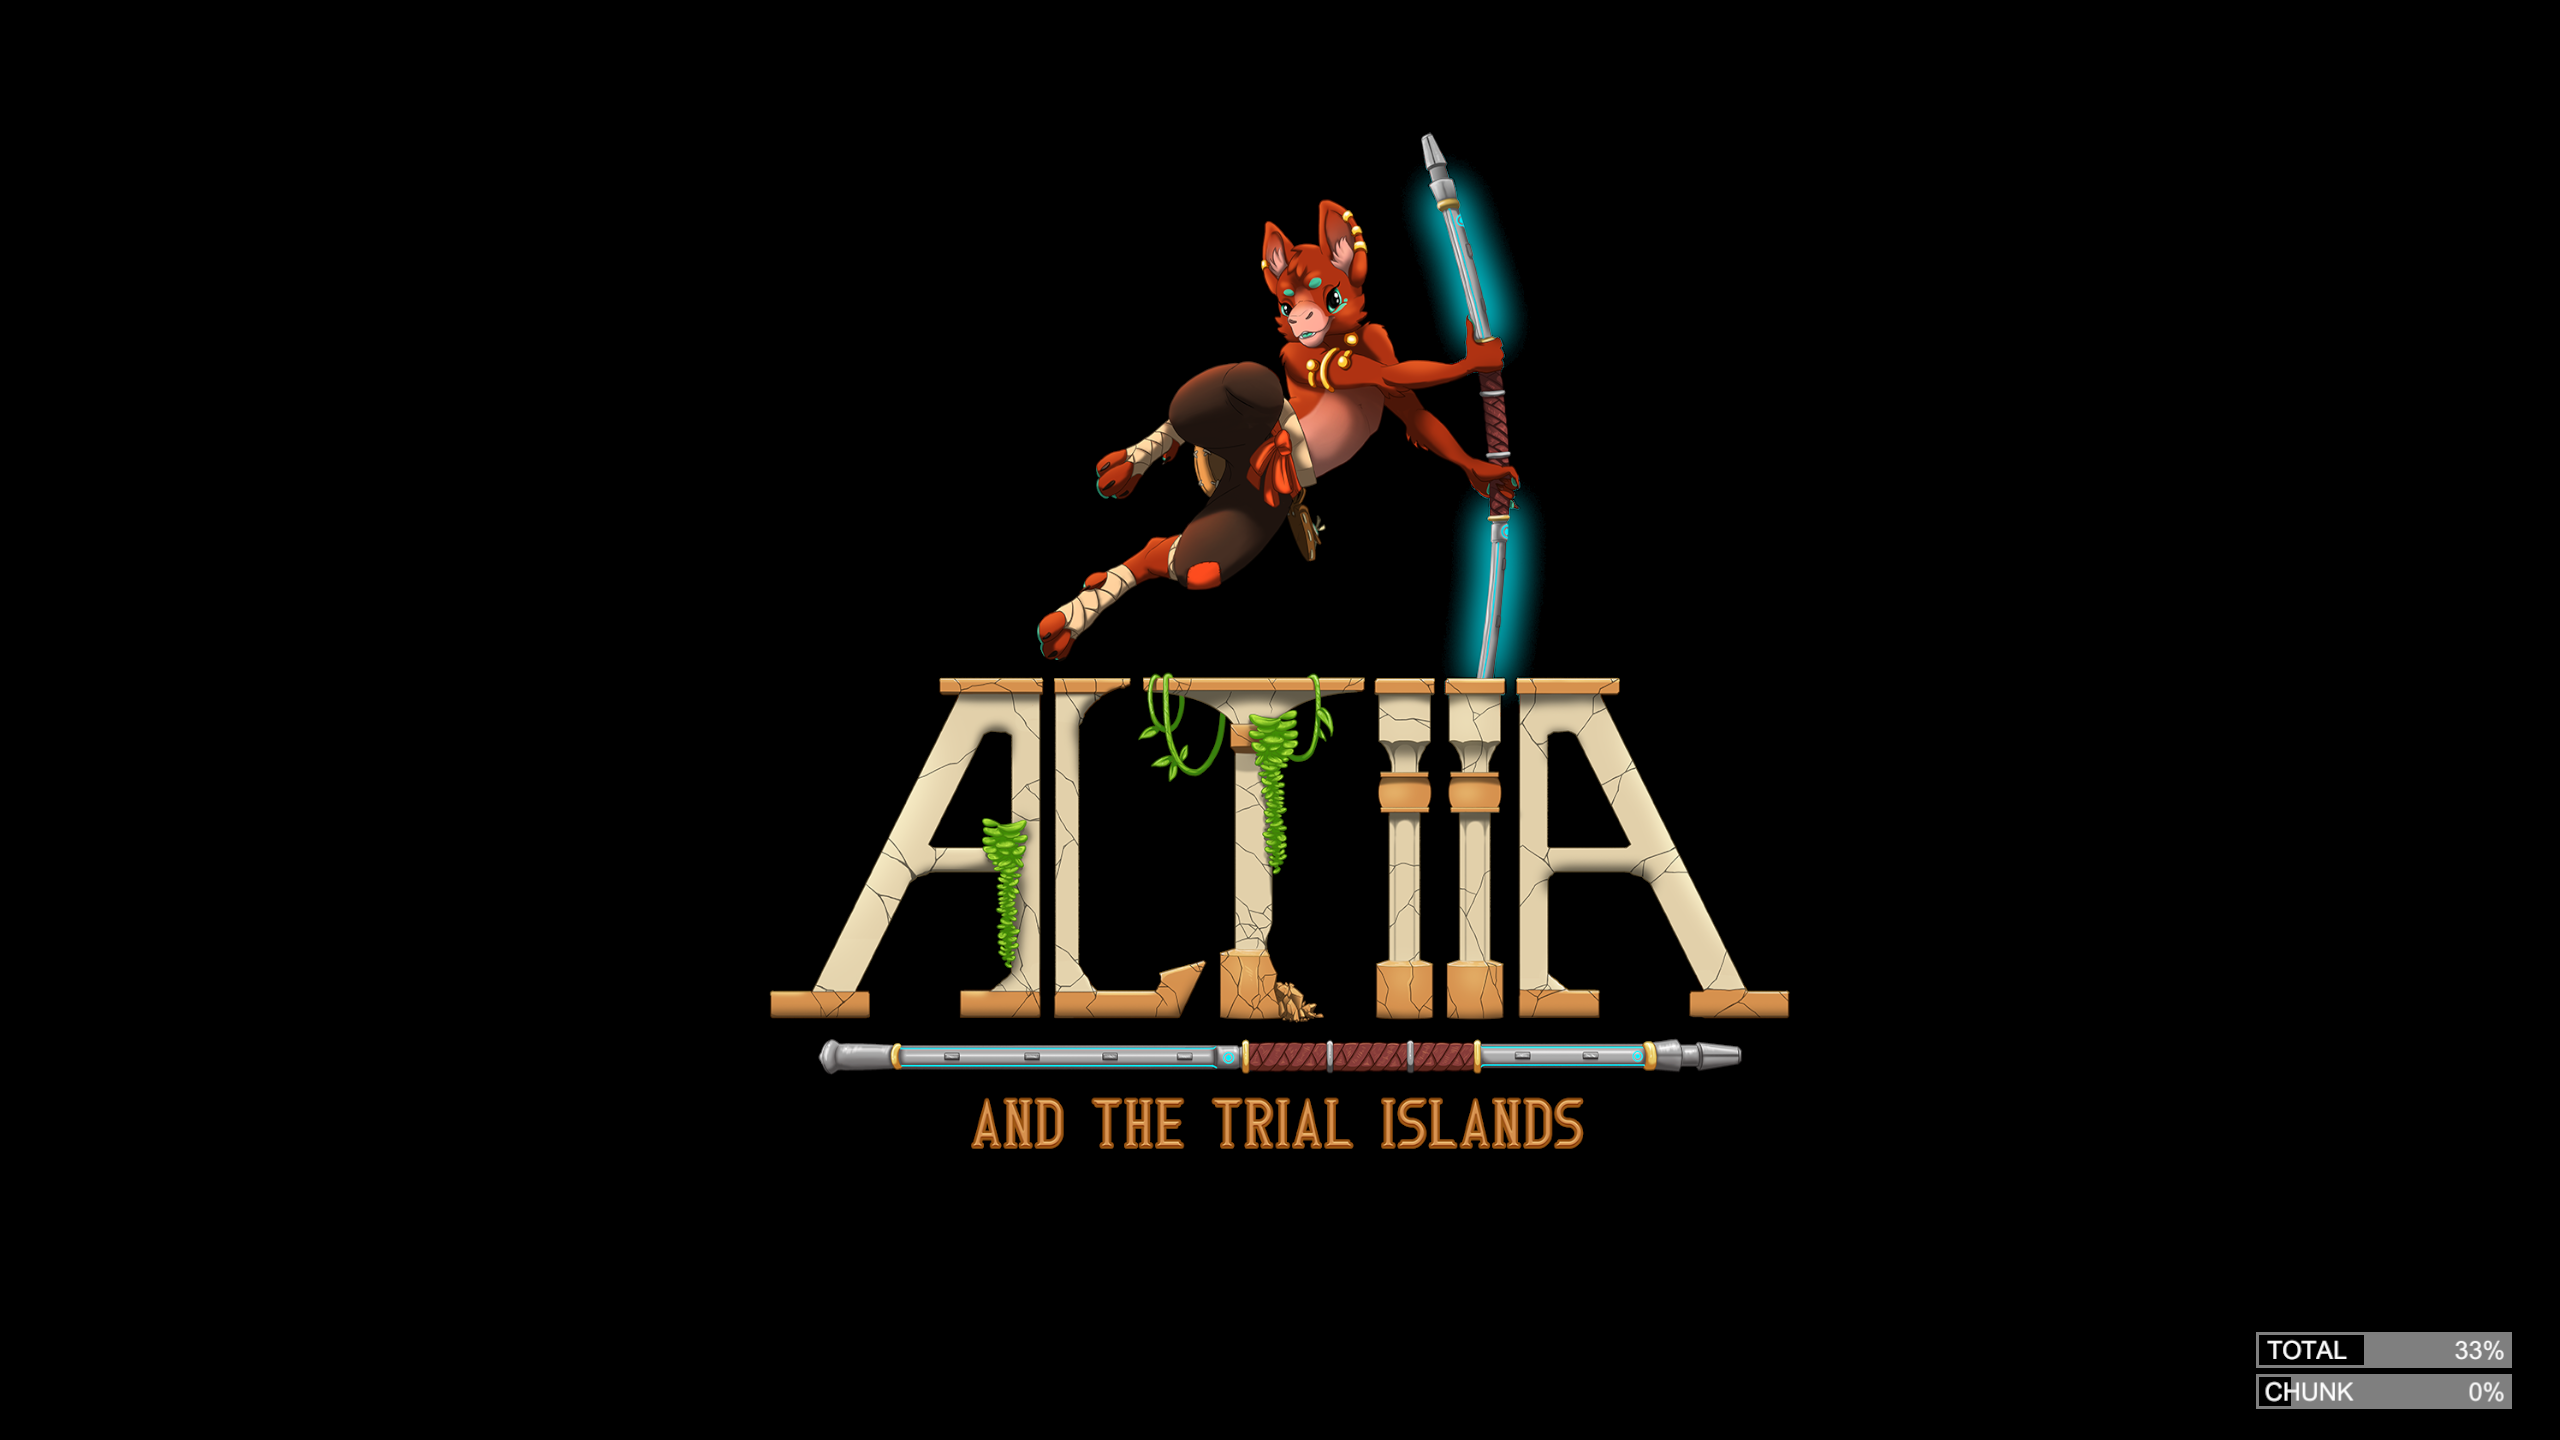
When the game starts or if the player goes to the Main Menu again, a loading screen is shown. I made two loadings bars which are shown in the bottom right corner. The top bar presents the number of scenes loaded and the bottom bar shows the percentage of how far the currently loading scene has loaded. When the top bar reaches 100% the loading is complete.
HUD
I implemented the HUD for the game. It shows important information for the player. When the player gets a pickup, a popup box will be shown with information about the pickup, and another box showing how many pickups of that type the player has and how many there is in total. The HUD also shows all information regarding playing or creating a challenge, which buttons to use, and the current time while playing a challenge.


